Xboxaddict.com Article
Turtle Beach VelocityOne Flight - Cleared For Takeoff
by Adam Dileva SPECS:
 - Connections: USB Connection: Xbox Series X|S & Xbox One | Windows PCs
- Software Compatibility: Microsoft Flight Simulator, Sim software with USB controller support
- Connectivity: Input Connectivity: 2M USB-A to USB-C Cable to console or PC
- Audio Connectivity: 1x 3.5mm audio port for stereo audio and microphone
- Axes: 12 Axes. Hall effect sensor on main yoke axis. Optical encoder (trim wheel) and variable resistor (levers)
- Dimensions: L 483mm (19.01”) x W 496mm (19.5”) x H 183mm (7.2”)
- Buttons: (2) 8-way POV switches, (2) 4-way HAT switches, (6) front-facing push buttons, (2) rear-facing push buttons, Xbox system buttons, (10) quadrant buttons
- Screen: Flight Management Display – Full color, 320 x 230 with adjustable backlight
- Lighting: RGB LEDs, adjustable via VelocityOne™ Flight Management Display
- Status Indicator Panel: (12) RGB LEDs with (3) included swappable backlit status panels
- Desk Clamp: Included (Built In)
INCLUDED:
- Control System: VelocityOne Flight Universal Control System (Yoke Handle, base & Throttle Quadrant)
- Tops: Detachable Throttle Tops (8)
- Inserts: SIP Inserts (3)
- Clamp: Desk Clamp & Clamp Tool
- Screws: Cockpit fixing screws (8)
- Cable: 1m USB-C to USB-C Cable
- Cable: 2m USB-A to USB-C Cable
- Guide: Quick Flight Guide
- Decals: Quadrant Button Decal Sheet, SIP Decal Sheet (2)
VelocityOne Flight:
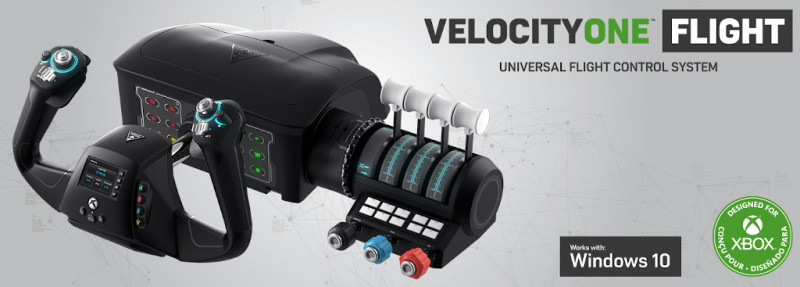
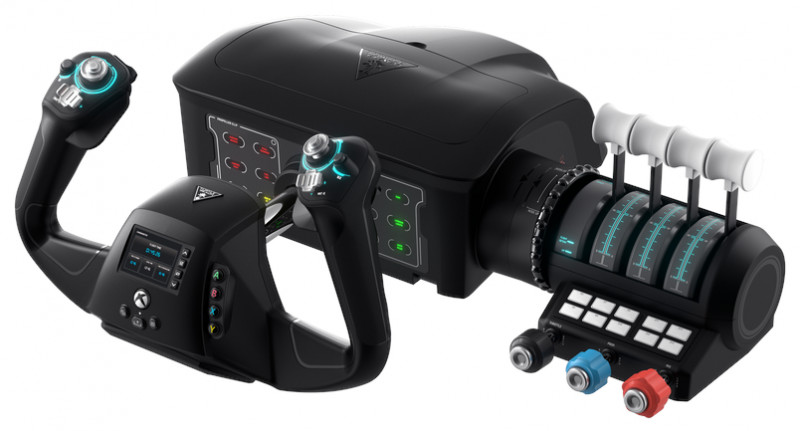
Turtle Beach has been around since the mid 90’s, making a name for themselves with gaming accessories throughout the years. Probably best known for their headsets, they do dabble in other gaming related accessories as well, and I was fortunate enough to check out their latest accessory, Turtle Beach VelocityOne Flight, which is their entry into the flight simulator genre with a game changing accessory for Microsoft Flight Simulator enthusiasts on PC or Xbox.
 It would have been easy for Turtle Beach to piece together a typical flight stick, add a few knobs or levers and call it a day, but after unboxing the VelocityOne Flight and getting my hands on it, it’s clear they’ve done their research to create a really unique accessory that brings the Flight Sim immersion to a whole new level. Like any racing game, once you get a decent wheel and pedals to play with, it’s hard to go back to a controller if you want that real immersion. Turtle Beach does this similarly with their VelocityOne Flight, as flying with a controller after using it just wasn’t cutting it anymore.
Now, before we delve indepth into everything VelocityOne Flight has to offer, know up front that it’s an investment. Priced at $379.99 USD ($489.99 CAD), that’s right, more than the cost of an Xbox Series S on its own, the VelocityOne Flight is a pricey accessory meant for enthusiasts. Again, there’s nothing quite like having a cockpit setup like this, either for PC or Xbox, and it makes navigating the skies much more of a true experience and less of a ‘game’, at a cost.
With an impressive Yoke system, numerous buttons, levers, and even a trim wheel, the VelocityOne Flight also simply works out of the box and plugs in with a single cable to your device. It’s not uncommon for console players to feel forgotten when it comes to more intricate and unique peripherals like these, as they’re almost always meant for PC players and lack console support. The question to really consider is that does the price tag justify the improvement to your Flight Simulator experience? On that note, let’s take to the skies and find out.
Look and Feel:
First off, the box that the VelocityOne Flight is packaged within is absolutely huge, as this houses the yoke and throttle components. which are separate items in the box, but they easily click together once taken out, which is your first task. While the whole device is black in color save for the throttles, it does appear to be a cheaper plastic. Now, that said, parts of the VelocityOne Flight feel absolutely fantastic and premium, especially with how naturally your hands grip the yoke sticks as they have a slight texture where your palms rest. The buttons make satisfying clicks, as do the triggers where your fingers rest. Don’t let the ‘cheap’ looking plastic look fool you though, the VelocityOne Flight feels wonderful and sturdy and I’ve had no issues when being pretty rough with it during some nosedives, purposeful or not, in my aircraft.
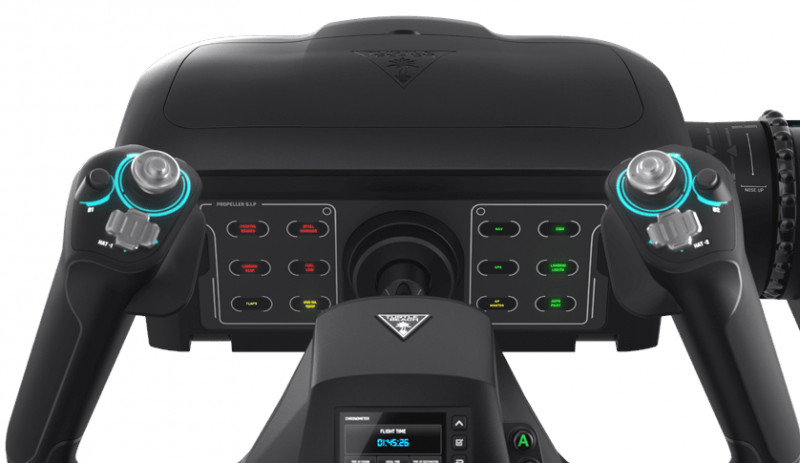
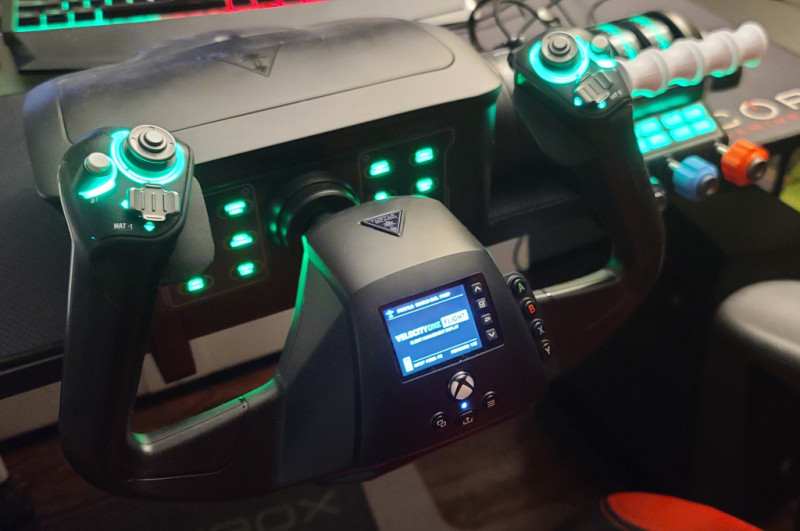
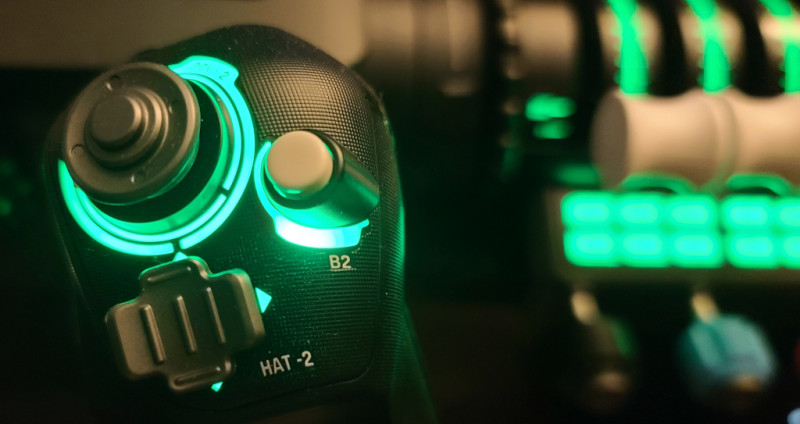
The aesthetics are great, as much of the buttons and lights are all backlit with RGB, which of course you can change to a handful of different colors based on your preference. Given that I was primarily using it on my Xbox, I of course had to stick with the typical green to match. Buttons are clearly labeled and Turtle Beach didn’t go overboard with a massive logo on the device itself other than a small icon on the yoke beside the integrated screen and a larger logo on the removable plate on top, but that one is the same color as the plastic, so it doesn’t stand out as much.
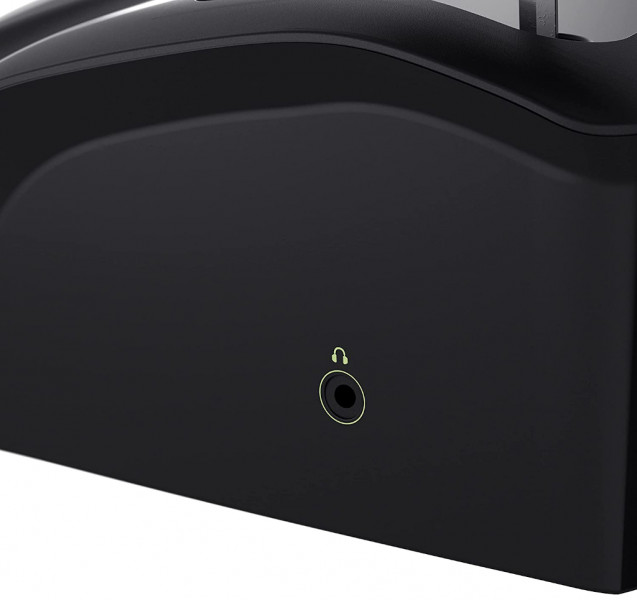
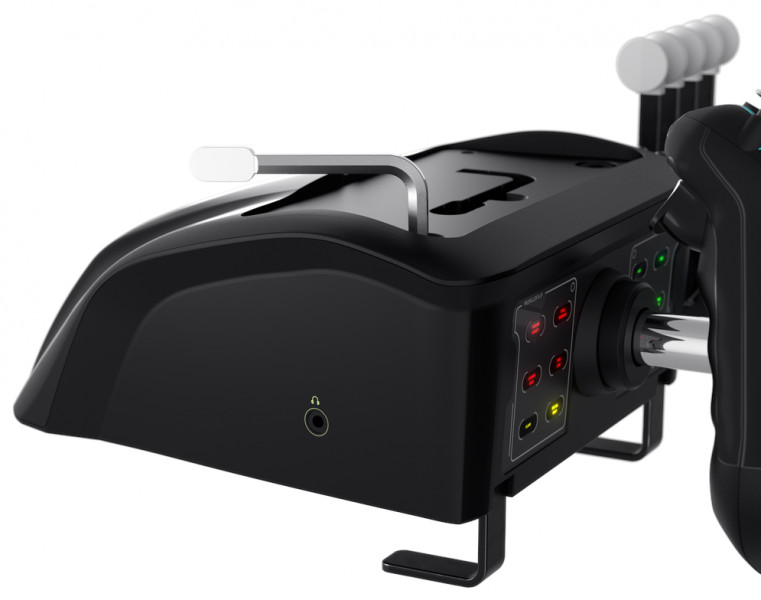
I’ll delve into it more shortly when I talk about the yoke, but there’s no haptic feedback when it comes to the VelocityOne Flight, so don’t expect the stick to ‘fight’ you when pulling hard or experiencing some virtual air turbulence. While this would have made for an even more immersive experience, it also would have made the unit even more expensive. On the far left side of the yoke you’ll also notice a small headphone jack, allowing you to plug in any 3.5mm headset and have its audio play directly through the device itself, much like you already do with controllers.
Setup:
Getting the VelocityOne Flight up and running is simple done in 5 easy steps and has a pictured guide in the box to help you:
1) Once unpacked, attach the yoke and quadrant modules together. This simply clicks and snaps into place easily in seconds.
2) Clamp to desk (which I’ll delve into shortly).
3) Connect the color coded cables. One short blue USB-C cable links the yoke and throttle together, and another USB-C to USB-A connects from the yoke to your PC or Xbox without need for any power cables.
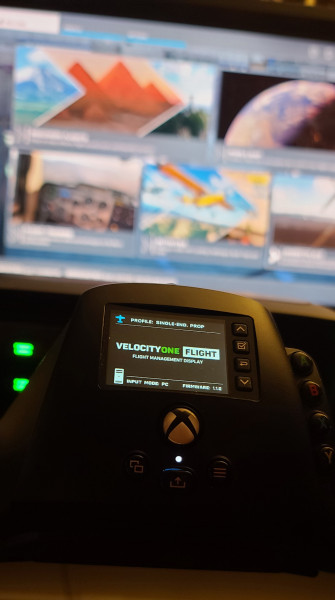
4) Once connected the VelocityOne Flight will turn on, indicated with the screen right in the middle of the stick. Here you’ll choose your input mode, PC or Xbox, and it’ll do a quick reboot if needed.
5) Download the Turtle Beach Control Center App. This is how you’ll update its firmware, which I had one waiting for me upon opening, and how Turtle Beach is promising to add more features that is going to take the VelocityOne Flight from great to a whole other level, but more on that shortly as well.
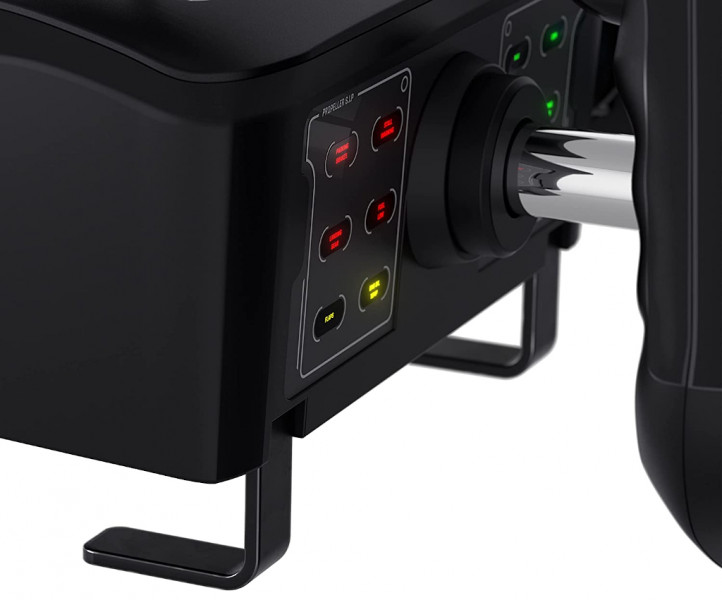 Now that you’ve completed these five steps, you’re ready to start flying. This brings us to how you’re supposed to secure the stick so it stays stationary. The easiest and quickest way to do so is to clamp and mount it to a desk or table nearby. This is done with a really interesting and clever integrated mounting system. The main top of the yoke has a panel that comes off, housing a specially shaped Allen Key and two screws that raise and lower the clamps. Twisting the screws with the included key for a few seconds extends it, and you place it on the desk or table you want to mount to, then tighten it back up and you’re good to go. It should be mentioned that it appears you could potentially overtighten it and possibly damaging the mounting clamps, but I was very cautious of this and stopped once it gave some resistance. There are also three screw holes along the bottom of the yoke and another three under the throttle component to use if you’re going to permanently mount it to some sort of rig, so you have options based on your setup and needs.
 The screen on the yoke handle is called the Flight Management Display (FMD), which is where you’ll get into the settings, profiles and more. Here you can change the RGB lighting, change profile from Single-Engine Prop to Twin-Engine Jet ,and you can even utilize it as a chronometer to display all different types of your flight information. While I will be focusing on the VelocityOne Flight’s Xbox compatibility and experience, I did try it with PC as well just to see the differences, and it’s virtually the same experience, which is wonderful for console players who usually get left behind somehow.
 Now, one glaring issue from the beginning. I had everything setup and launched Microsoft Flight Simulator and I was trying to navigate the menus before jumping into a flight itself. Considering there’s two thumb sticks on the yoke handle, I was quite surprised to realize I needed to have a controller beside me just for the menu navigation before starting my flight. While not a deal breaker, spending this amount of money for it to not work with the menu of the sole game you’re purchasing it for seems like a glaring omission. Maybe this is something on Flight Sim’s end and not Turtle Beach, but it was an annoyance either way.
That frustration aside, the default settings will be good enough for you to simply start flying and having a great time without having to remap a plethora of buttons. Simply plug in, set it up, and you’re ready to start flying (controller issue aside). My only complaint in this setup though is that the cable that runs from the VelocityOne Flight to your PC or Xbox is only 2 meters, or 6.5 feet long. Sure that’s a decent distance, but I had to get creative with my setup given my TV placement compared to my Xbox Series X that’s further away in a corner. This didn’t leave me a lot of extra room to sit further back, so I was forced to be closer to the TV than I would have liked. Could I get a USB extender, sure, but I’m going with what comes in the box for this initial review and it’s not recommended to extend further than 3 meters for some reason either.
Yoke:
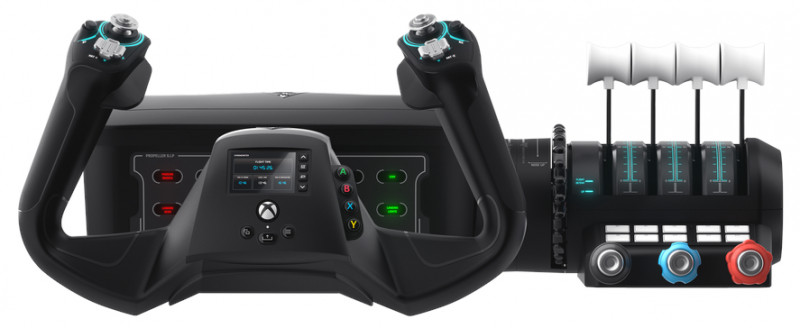
The yoke is basically the ‘steering’ component of an aircraft if I was to dumb it down. The yoke handle feels fantastic in your hands, especially where your fingers utilize the knobs and triggers. Twisting the yoke left or right is how you use your Ailerons, rolling your aircraft to the left or right and able to rotate 180 degrees, true to life. Pushing the yoke inwards or pulling outwards is how you use the Elevators of the plane, pitching your nose up or down. The triggers are how you’ll control the plane’s Rudders, allowing you to yaw the aircraft for adjustments and while on runways.
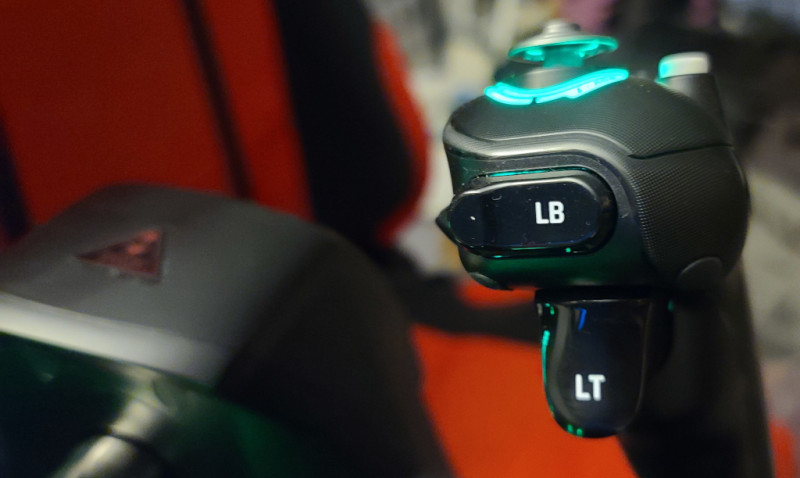
It seems Turtle Beach has done their homework, utilizing a non-contact Hall Effect sensor within the yoke shaft. Upon doing some research, it seems as though this type of technology is essentially going to have the VelocityOne Flight last much longer term without as much wear and tear internally, and given its price point, that’s a clear win. The yoke is very sensitive to movements, even very minor, so it took me a handful of flights to get used to making minor adjustments instead of being more severe when trying to manipulate the Ailerons and Elevators.
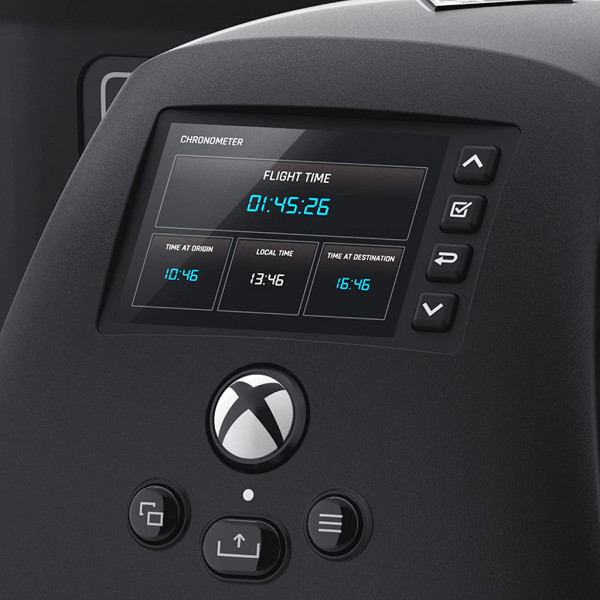
The Flight Management Display (FMD) is the little screen in the middle of the yoke handle. This screen does more than I expected, yet I expected it to do more than it currently does. The FMD is mainly used for switching profiles and changing settings, but there’s also another clever use for it. Essentially, you can put it into a ‘training mode’ and any buttons you press or any throttle/yoke movements will all show you what they do on the FMD screen itself. This means no need to load up a game and start pressing random buttons to figure things out, as you just try each button and lever within this mode and you’re told exactly what it does. It is great for figuring out where your parking brake button is located so you can get off the tarmac. Eventually you’ll know what every button on the VelocityOne Flight does instinctively, but this is great when starting out and you don’t necessarily want to stare at the included cheat-sheet poster while mid-flight. I do wish the FMD could be used as one of your digital instruments from the cockpit, and I hope this is an option in later firmware updates.
Right behind the yoke handle is a Status Indicator Panel. This is basically a panel for all your lights which give you information about your aircraft, such as if your parking brake or landing gear being engaged or not, stall warnings, auto pilot, low fuel warning and more. In theory this sounds amazing, but as of the time of writing this review, the lights behind this panel are simply static and don’t reflect anything in real time when it comes to what’s happening during your flight or in relation to your aircraft. The lights behind the replaceable panel are always on, and can be changed via the FMD settings color wise, but there’s zero functionality to them at this point. Having an annunciator panel included, but not working (yet) also seems like a big miss. It does sound as if this will be patched and working in a future firmware update, but again, I have to take it for what it is for my time with it as of writing this review.
Controls:
You may have noticed that I haven’t mentioned pedals, which some higher end flight setups do use and incorporate. While these may seem like a ‘miss’ initially, and I thought that too, the way the triggers are used for the rudders feels natural and I quickly forgot about not having any included pedals in the first place. While having the rudders mapped to triggers instead of pedals might not be the most authentic simulator experience, it works quite naturally. Just because they’re mapped to the triggers, I was still able to stay straight during takeoff and landing. Where your thumbs initially rest are where you’ll find the POV and HAT switches that control your different cameras and views, as well as utilizing the HAT switches for many aircraft controls.
 Throttle:
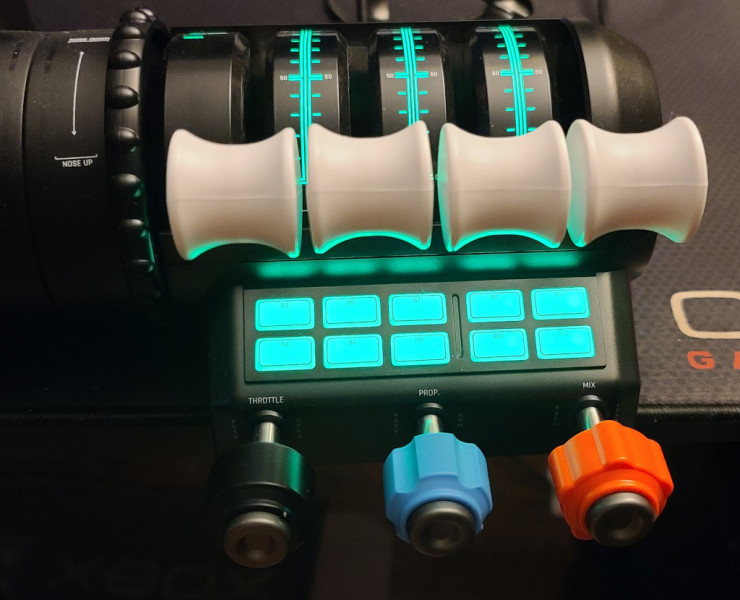
To the right of the yolk module is the throttle component. This is the other half that you snap together to create the full VelocityOne Flight unit. What makes this modular throttle quadrant unique is that it has Lever and Vernier controls, ten programmable buttons and a trim wheel all together. The four quadrant levers are individually moveable, meant for controlling the thrust levels on multi-engine planes like jets. They’re also able to be used for Flaps and Spoilers and there’s even a second set of different shaped and colored knobs to swap out as you see fit.
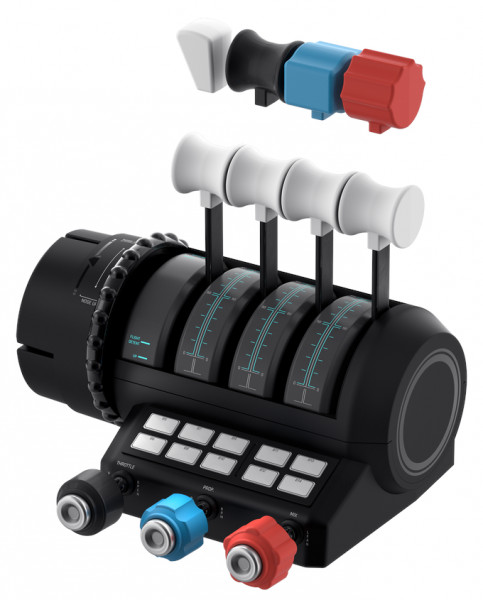 Right below the Levers and programmable buttons are three TPM Vernier Levers. Meant to recreate the engine controls on lighter aircraft, like the Cessna 152, which I’ve resorted to using as a more relaxing flight experience with the VelocityOne Flight. They all pull out and push in, able to be adjusted for fine tuning your engine. The Black lever adjusts the thrust and RPM of the engine, Blue adjusts the tilt angle of the propeller blades, and finally the Red regulates the fuel to air ratio for the engine.
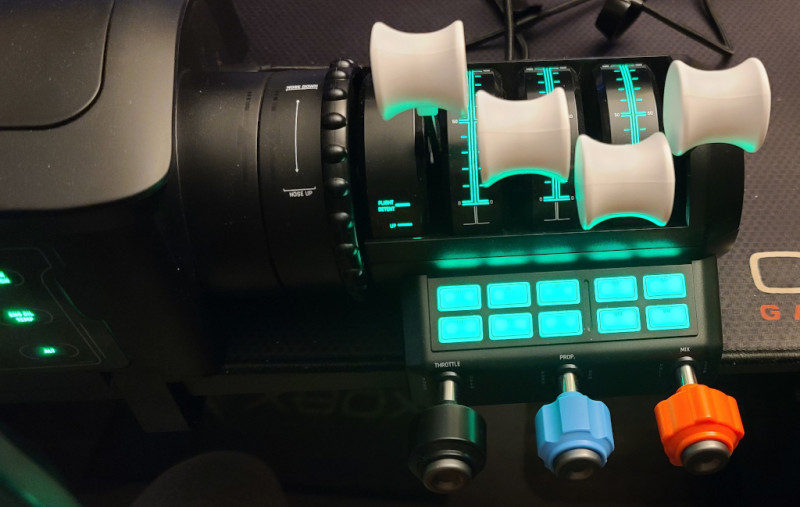
Having the two different types of throttle controls allows you to quickly swap between single engine and jet engine planes, depending on your preference. What I really ended up relying on quite often though was the integrated Trim Wheel that allows you to keep your plane altitude level without needing to keep your hands on the yoke. Having this wheel allows you to make tiny adjustments to the nose of the plane up or down, making quite a big difference in the ease of flight.
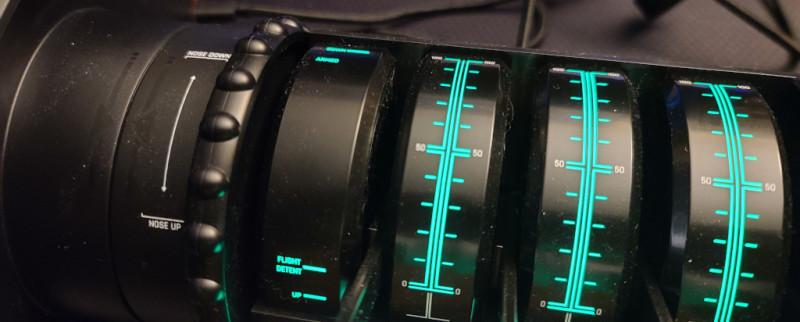
The Vernier controls have a wonderful feeling to them, with just enough resistance and extending a decent length. The four Quadrant Levers on the other hand feel quite loose. They stay in place where you leave them after adjustments, but there’s practically no resistance, so they don’t feel nearly as good as the prop engine controls except when it clicks all the way lowered into Reverse. The Trim Wheel is also perfect though, having really good resistance to it with numerous bumps along the rim for easy adjust with your fingertips without having to take your eyes off your flight.
Gameplay Experience:
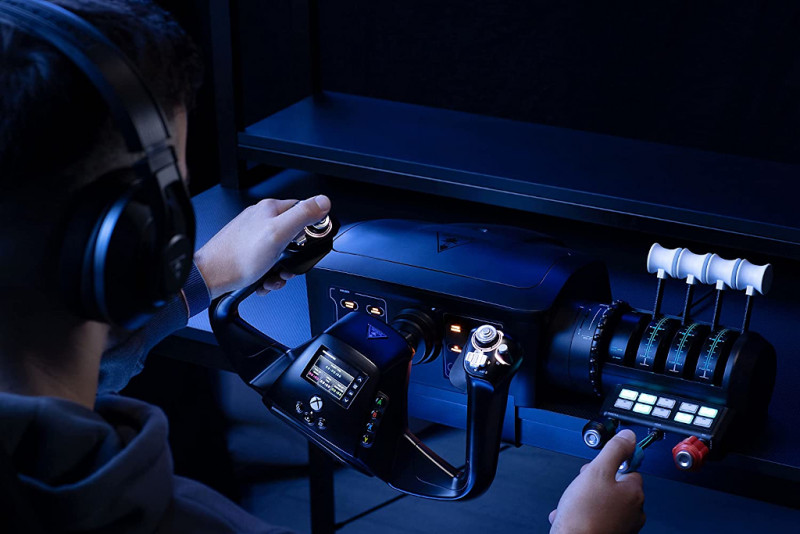
I dabbled in Microsoft Flight Simulator when if first launched in 2021, and while I enjoyed it, I eventually gave it up due to the tricky and confusing controls with using a controller. While it’s not impossible to get the hang of all of the button combinations, and the game was fantastic, it was hard to get that true simulation feeling with a controller in your hands. The Turtle Beach VelocityOne Flight not only solves that problem, but brings Flight Sim to a whole new experience on the Xbox Series X|S that makes me unable to go back to playing with just a controller. The ease of use of the yoke, throttle and buttons controls make for a simply better overall experience and made me WANT to play more Flight Sim and explore the world from the skies even more. My young daughter would have never wanted to play Flight Sim previously with the controller, but now everytime I setup the VelocityOne, she's asking to jump into the virtual cockpit and take to the skies.
Final Thoughts:
I wish I could convey how much of a difference the Turtle Beach VelocityOne Flight made the core flying experience, as it’s a literal game changer. While it’s going to obviously cater towards the more hardcore crowd with its focus on realism, features and steep price, it’s a great tool for beginners too if money isn’t much of an issue. The VelocityOne Flight is an investment, there’s no doubt about it, but it’s well worth it if you’re really into Microsoft Flight Simulator and want a true to life experience, or at least as close as you can get in your living room while playing on your Xbox Series X|S. While it has some minor issues and missing features, and I’ll be excitedly waiting for firmware updates that add even more needed functionality, I feel incredibly immersed playing Flight Sim with the VelocityOne Flight. Turtle Beach has cleared you for takeoff if you can afford the ticket.
**Turtle Beach VelocityOne Flight was provided by Turtle Beach and reviewed on an Xbox Series X and PC**
